Remote class - Zoom
The goal of this section is to provide the reader with a simple to understand way on how to hold remote lessons on the platform "Zoom" on Linux Ubuntu 20.04 operating system.
There will be 7 sections in this guide:
1. How to register
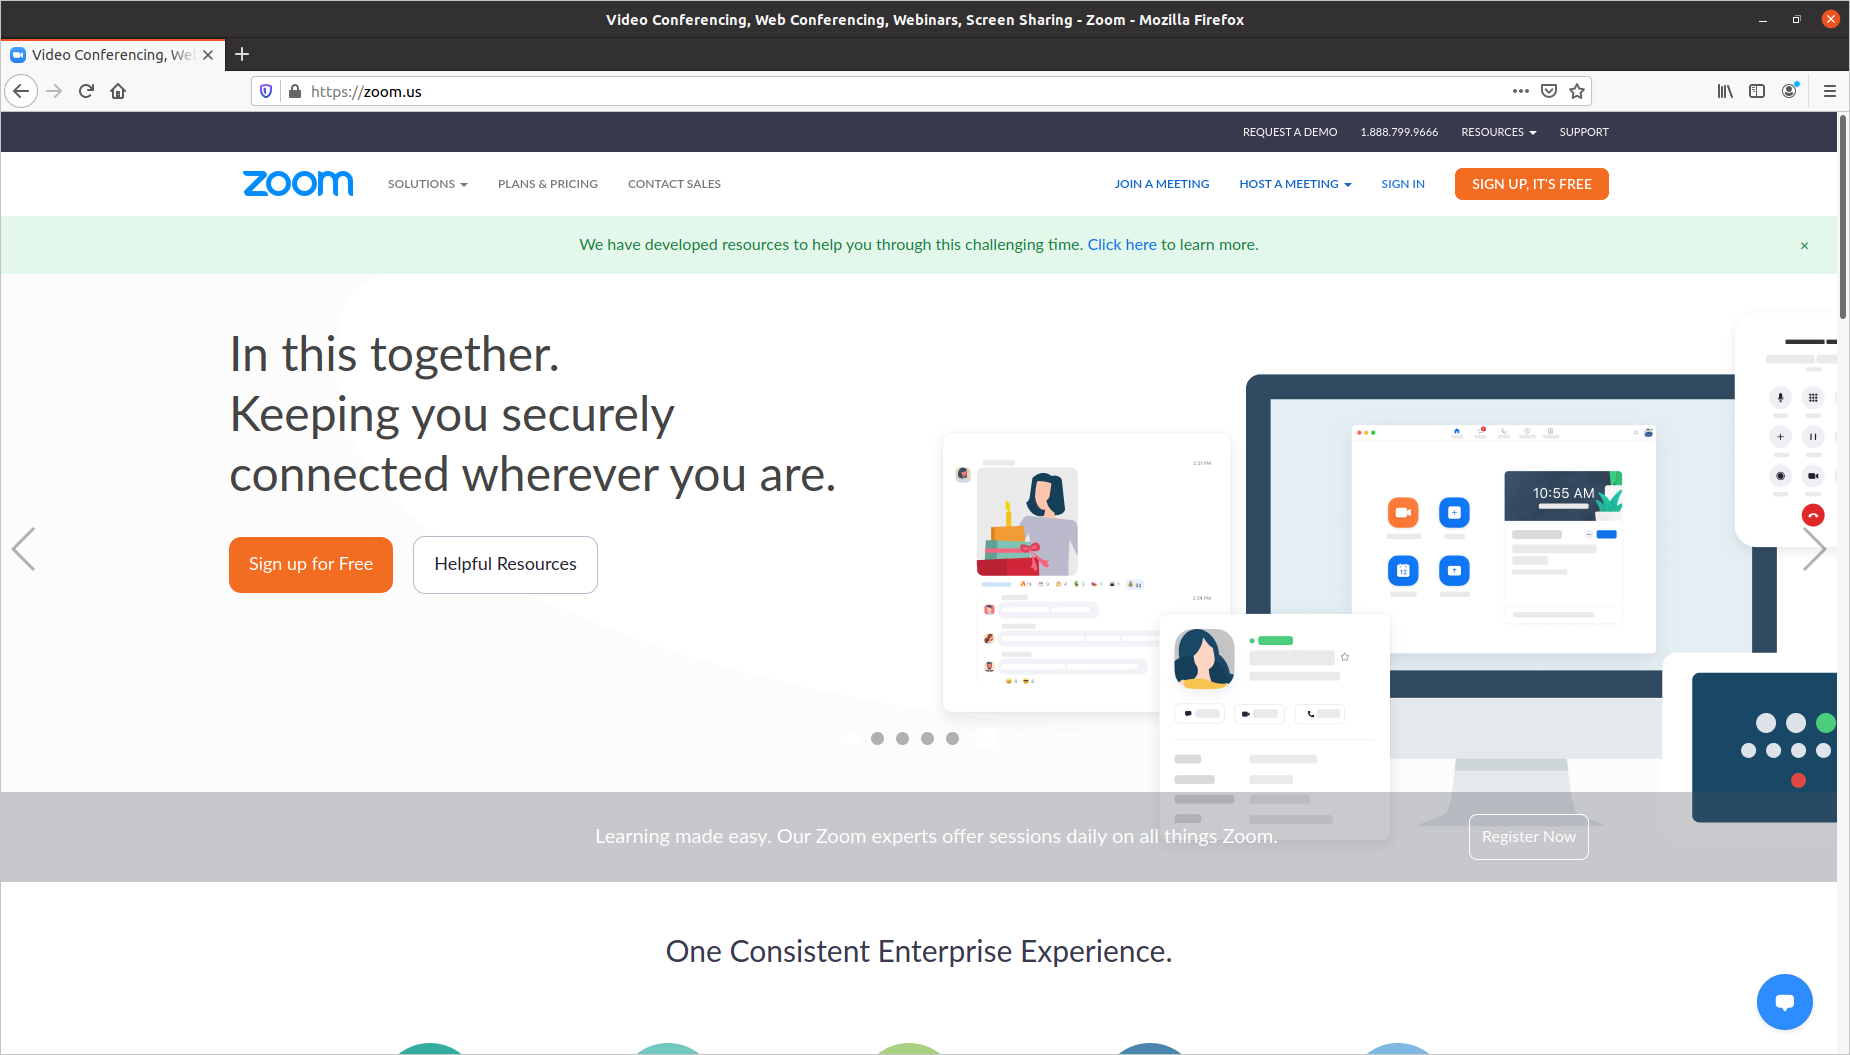
1. Firstly, enter the official Zoom website.
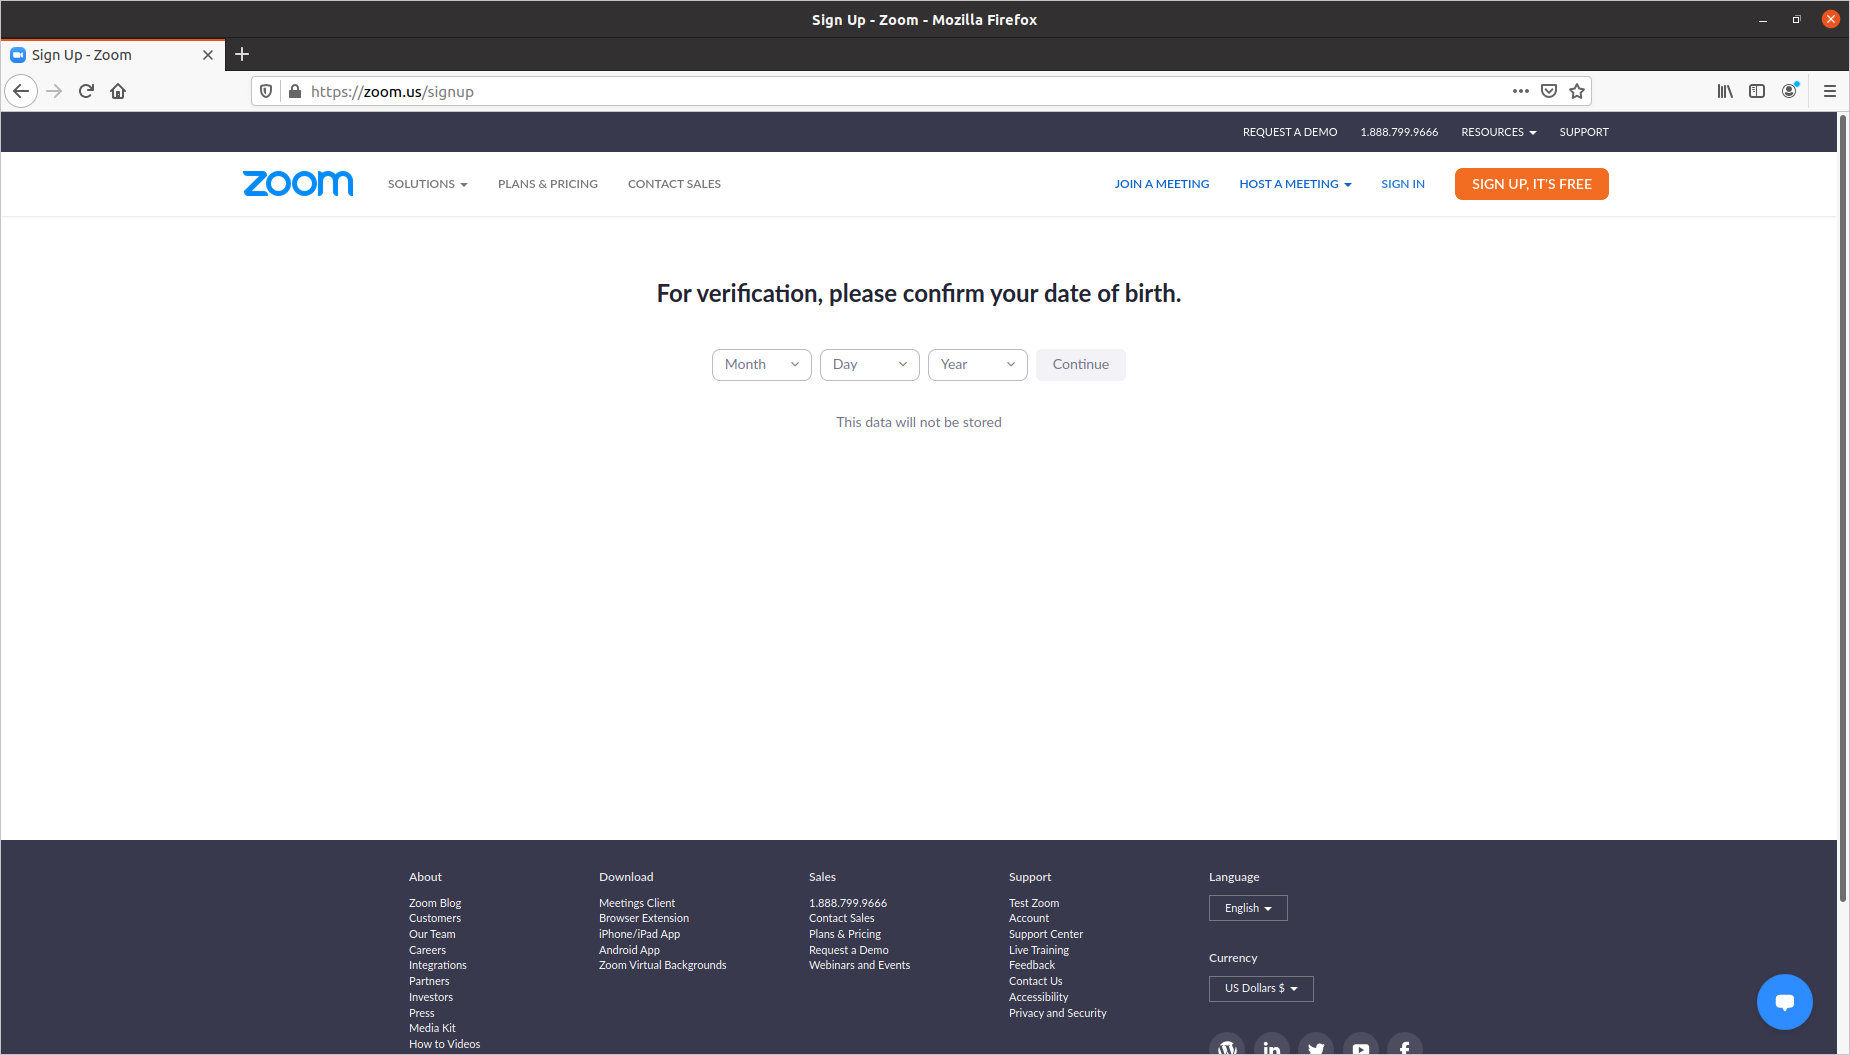
2. Then click on the orange button "Sign Up" in the upper right corner, and enter your age.
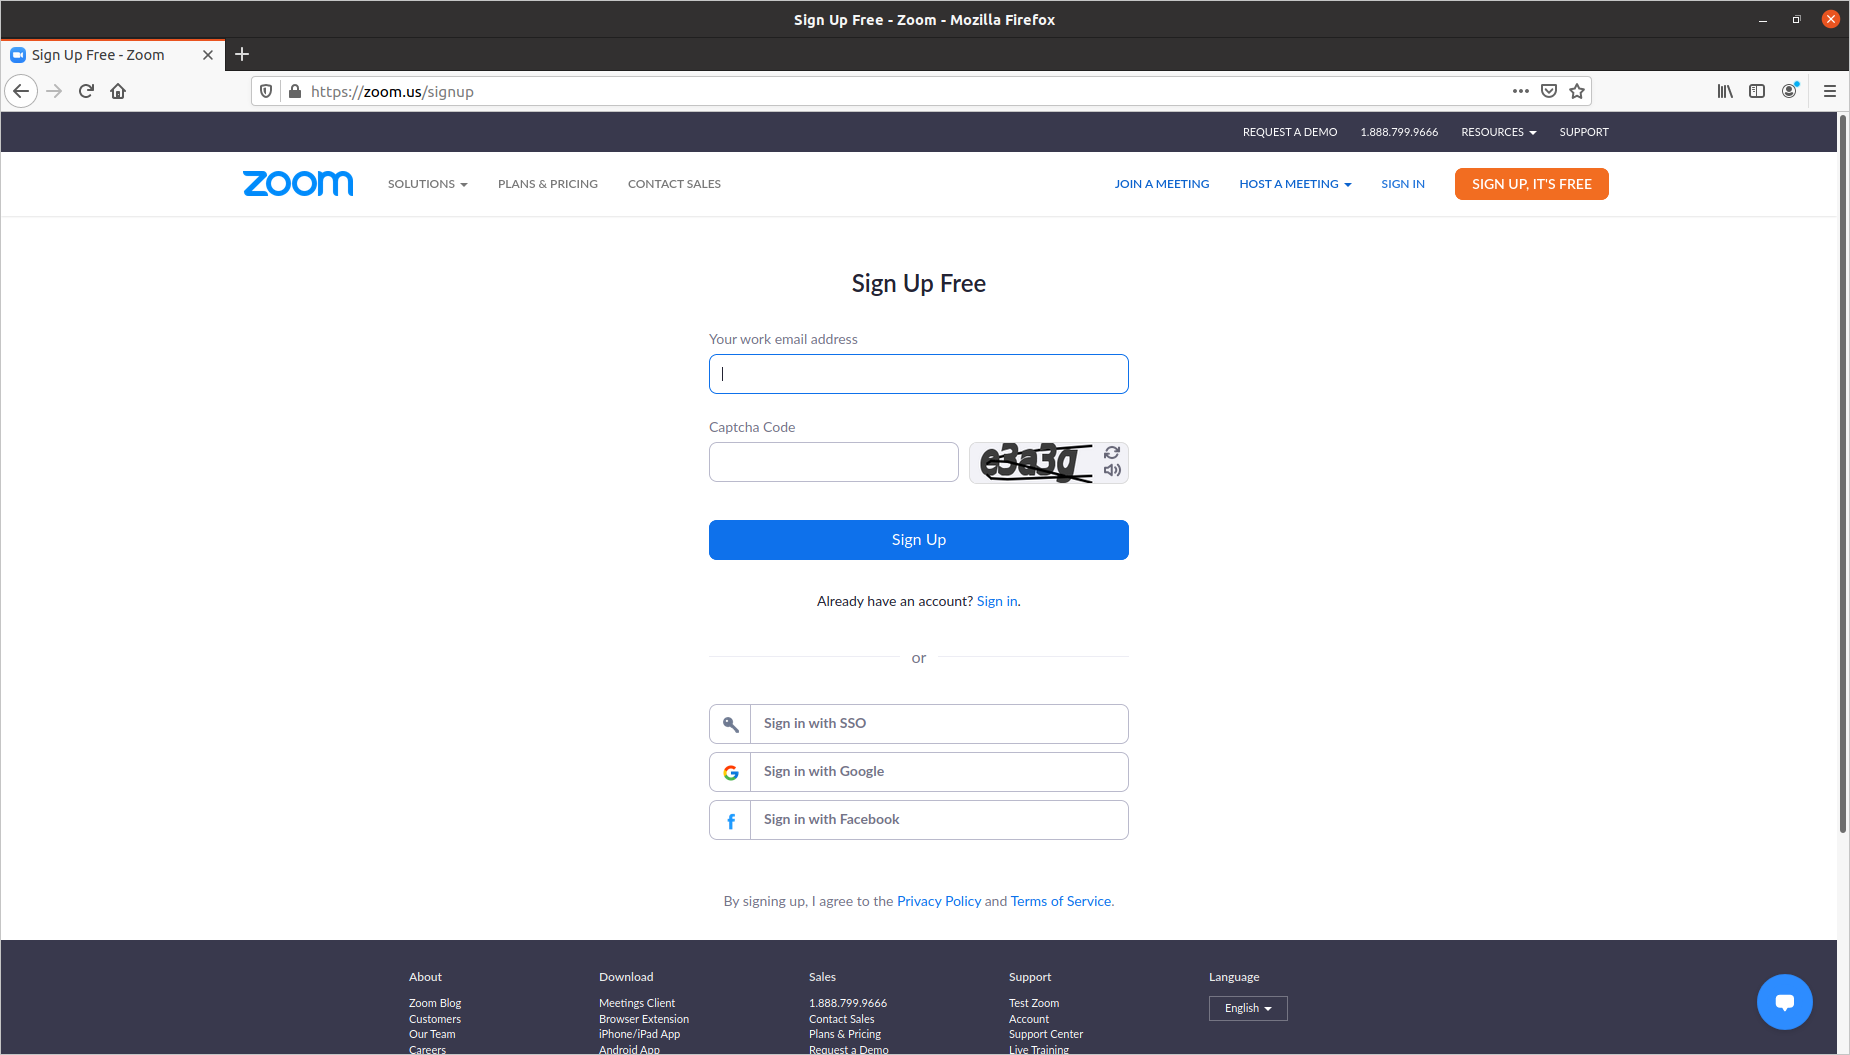
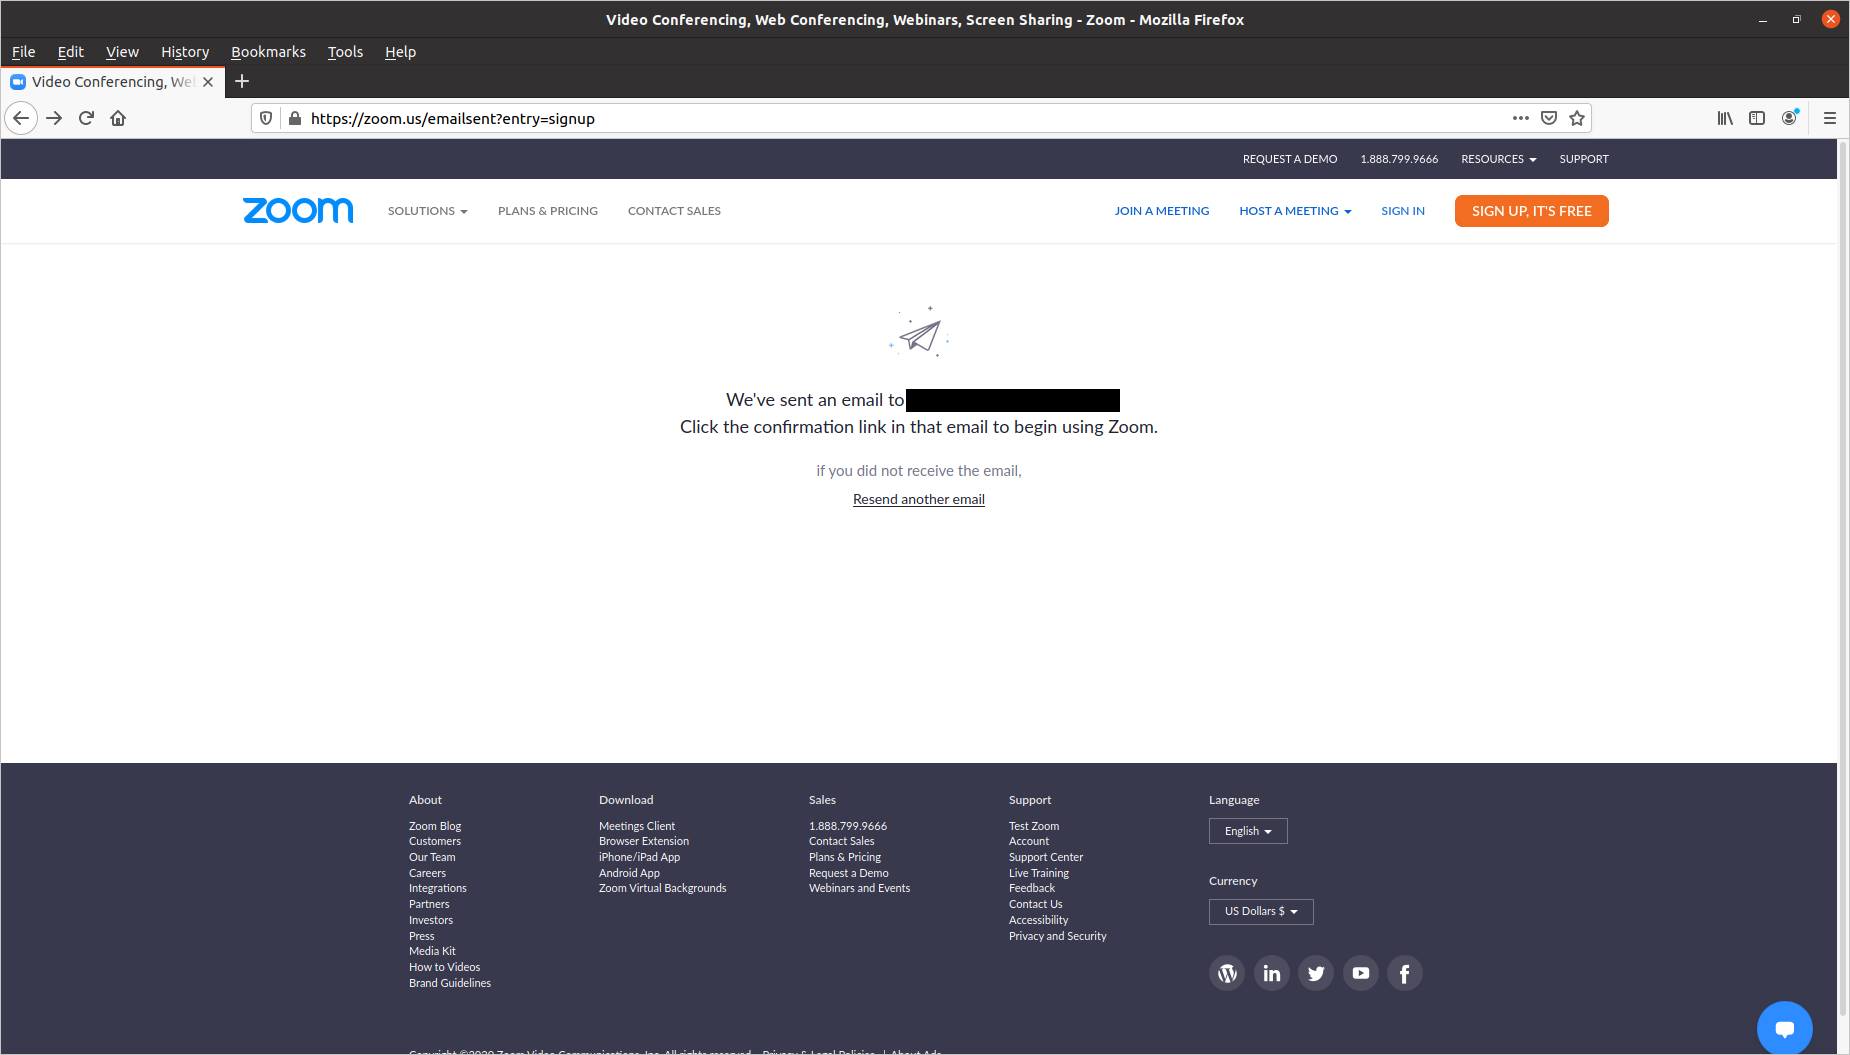
3. Then you will be asked to provide your e-mail, when you have done that, Zoom will send an e-mail to activate your account. You have to open the e-mail and click on the button "Activate account".
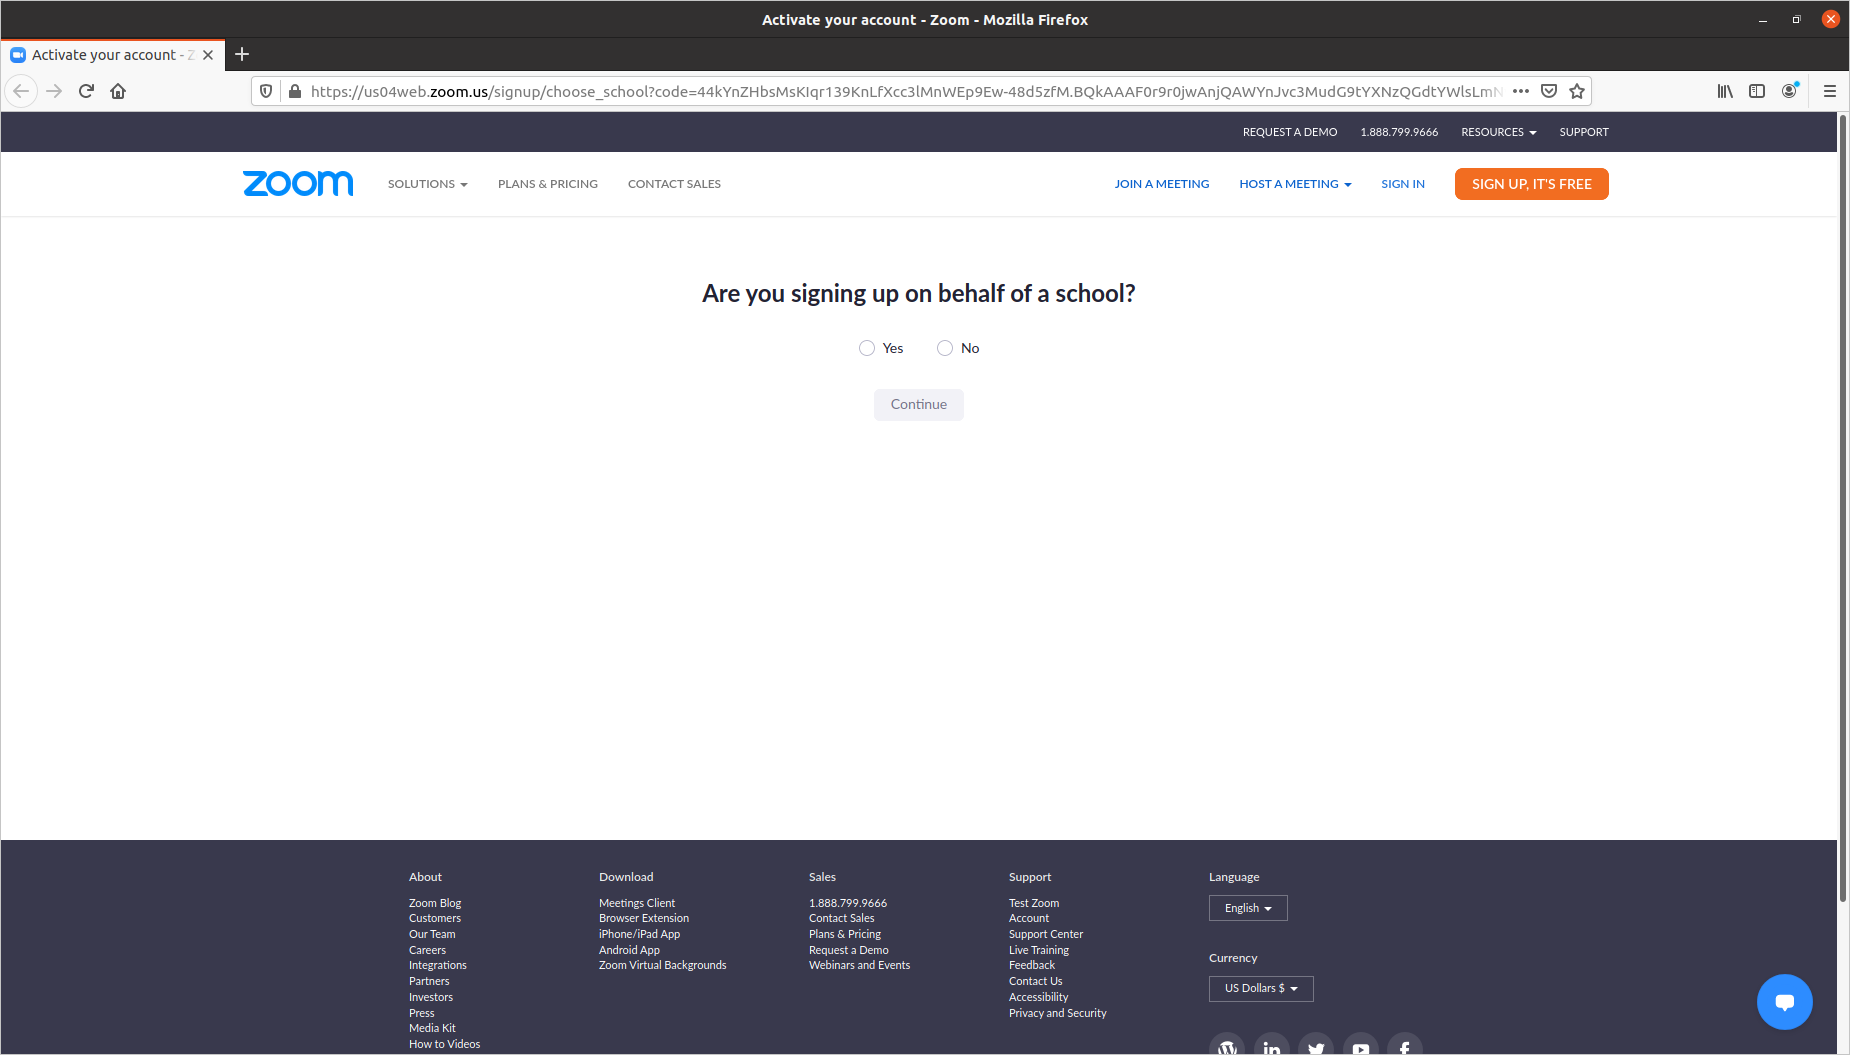
4. When you have done that, you will be asked if you are registering on the behalf of a school. Select the appropriate option and click on "Continue"
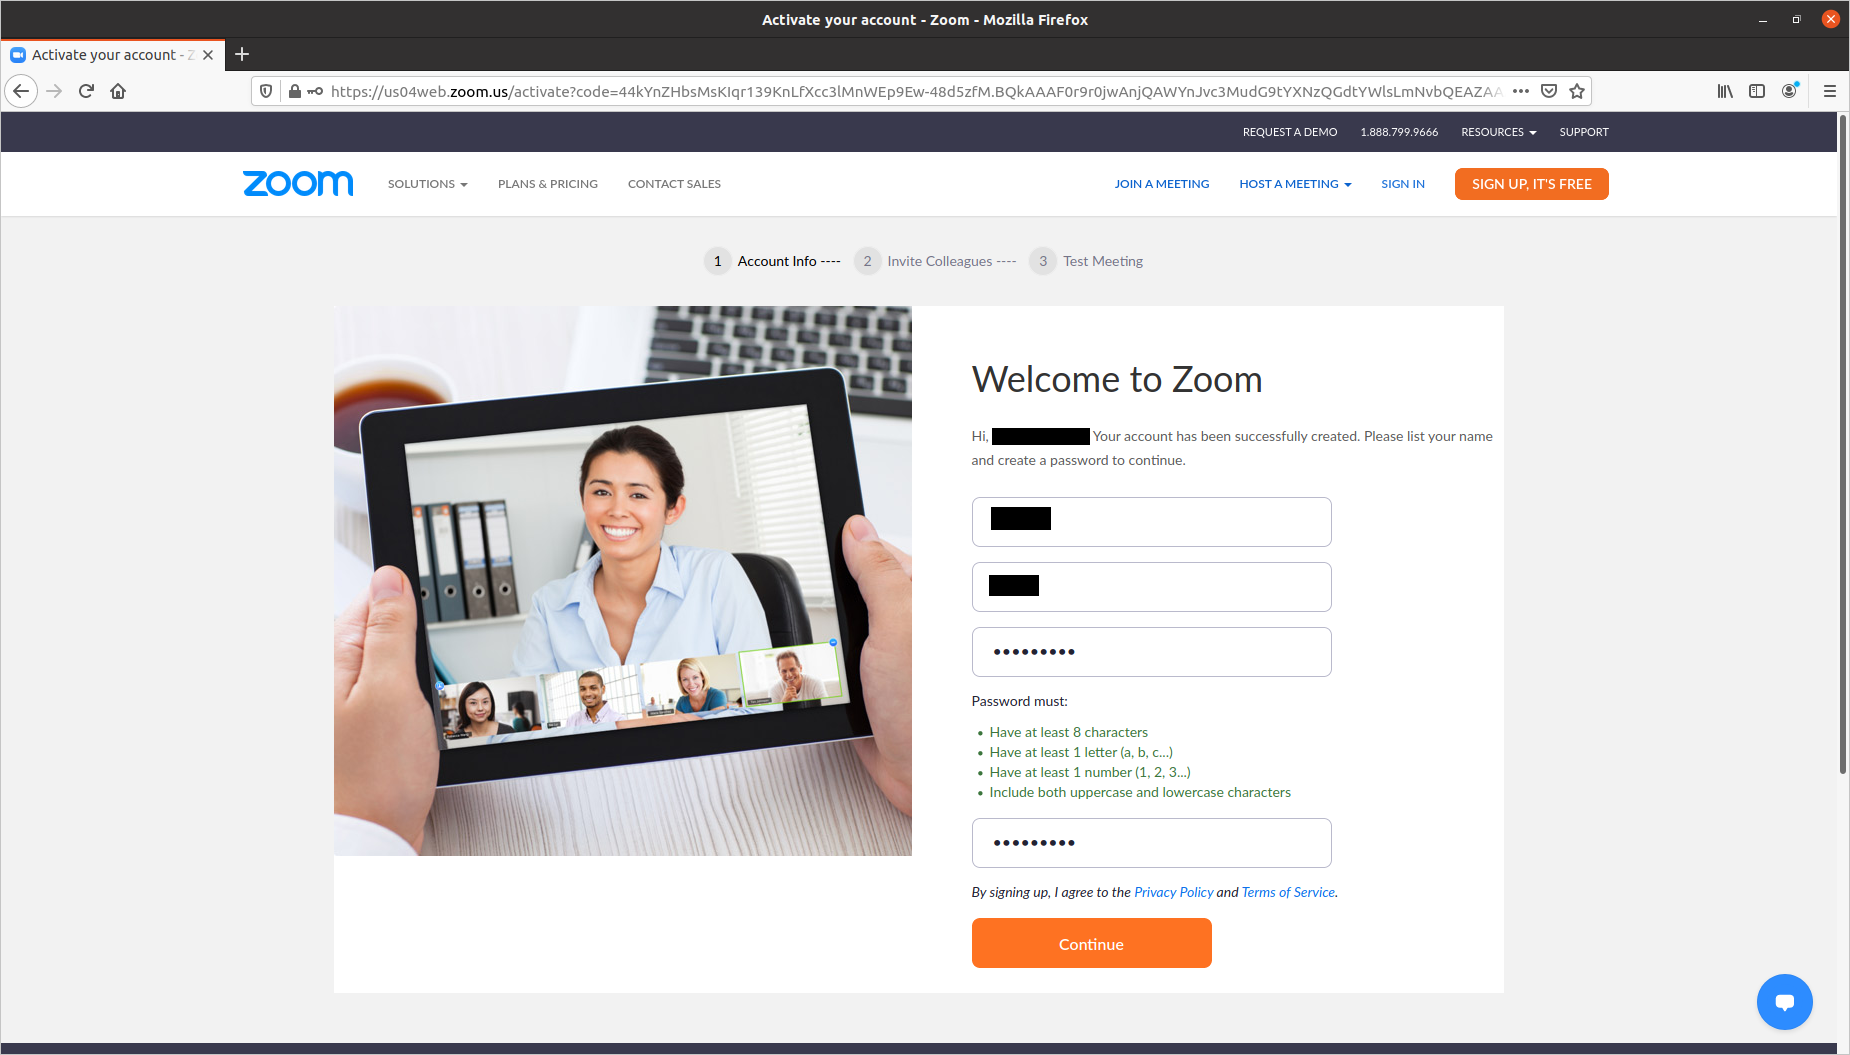
5. Then you will be asked to provide your name, surname and a password whih you will have to use to log in to your new "Zoom" account.
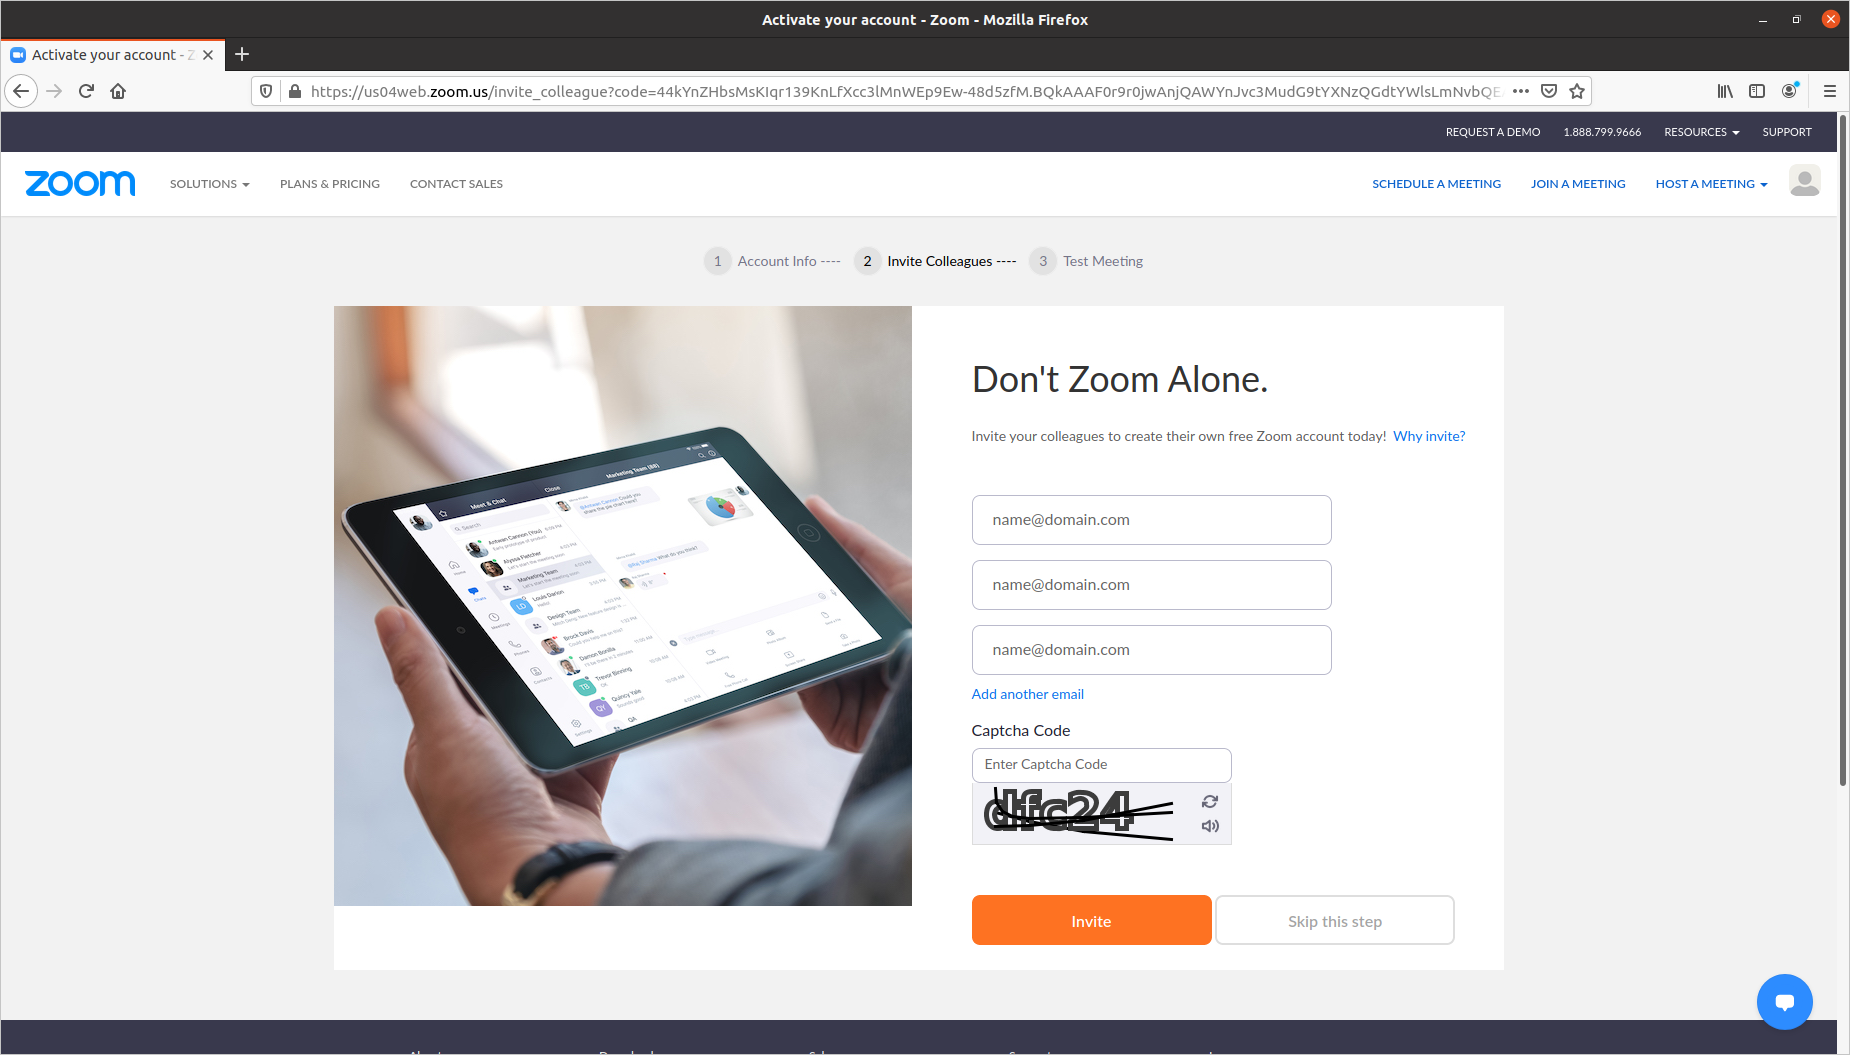
6. Then you can invite colleagues to join "Zoom" if they don't have a profile yet. If this step is not neccessary, click on the button "Skip this step".
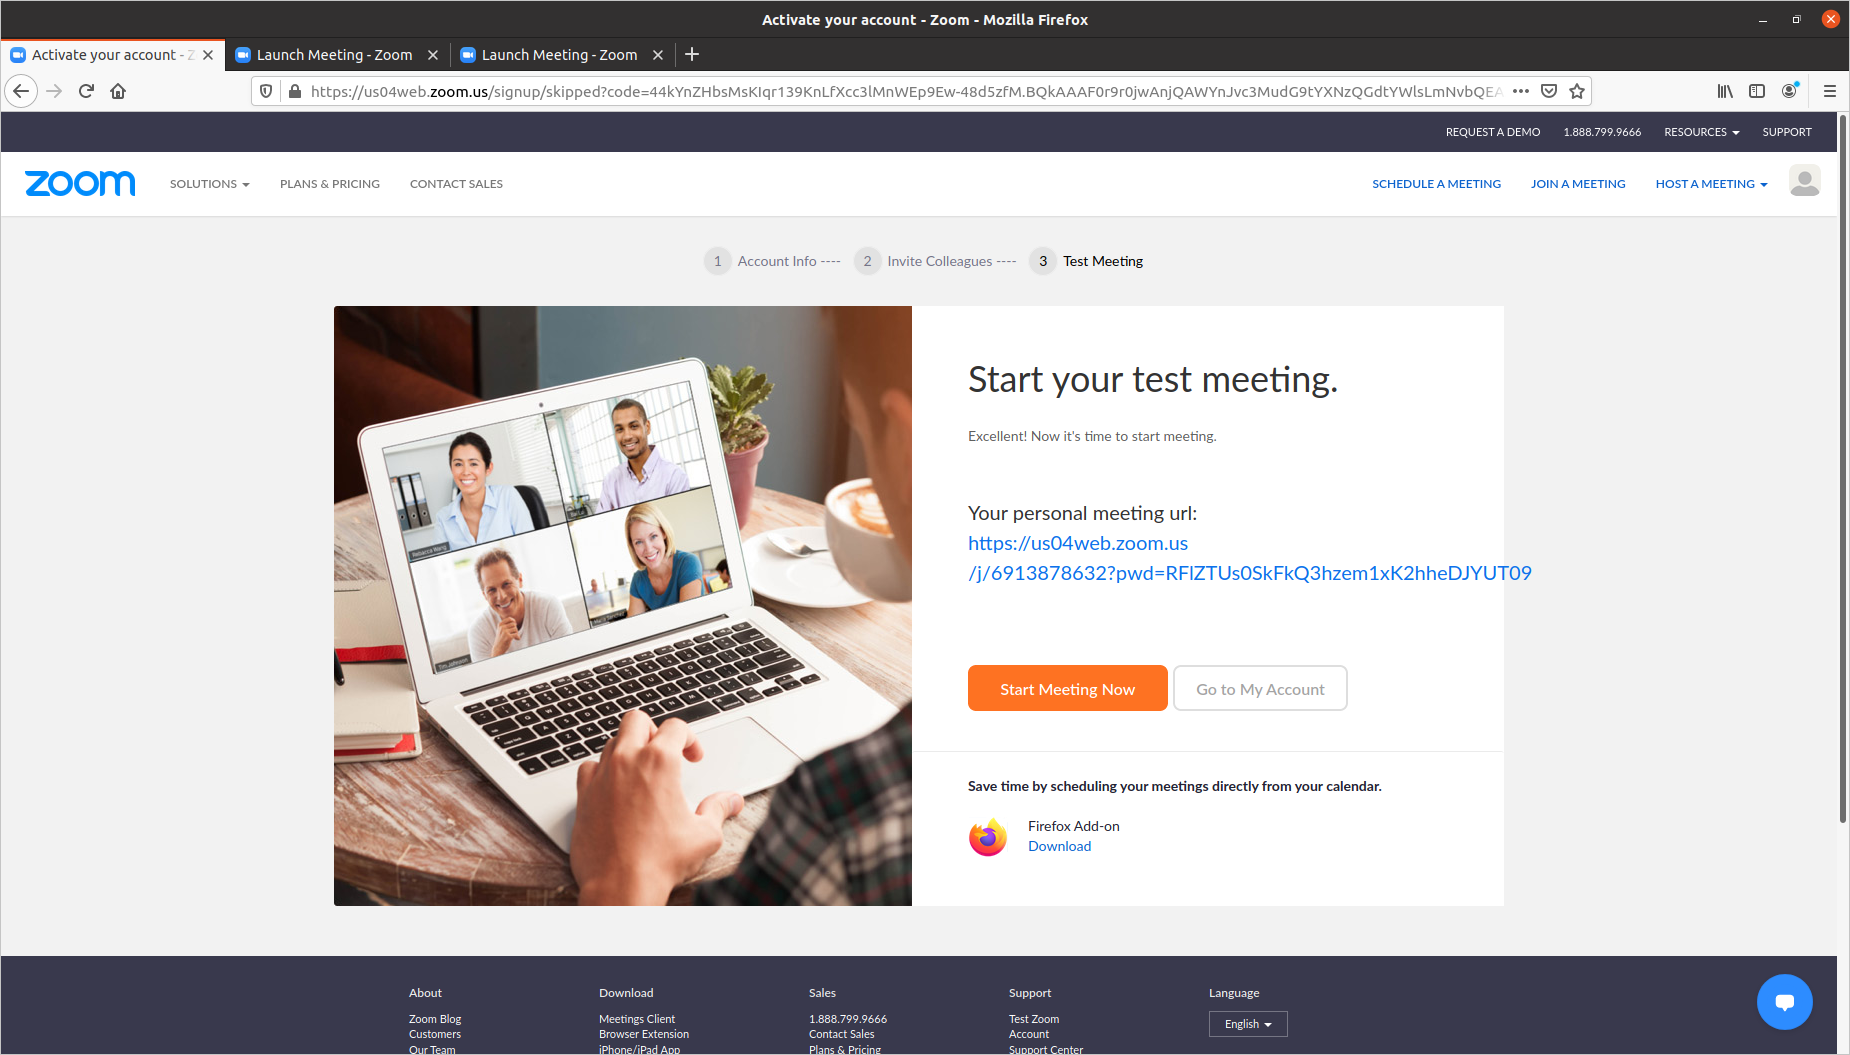
7. Then you can try to host a test meeting by pressing the button "Start meeting now", but otherwise the registration step is complete!
2. How to download "Zoom"
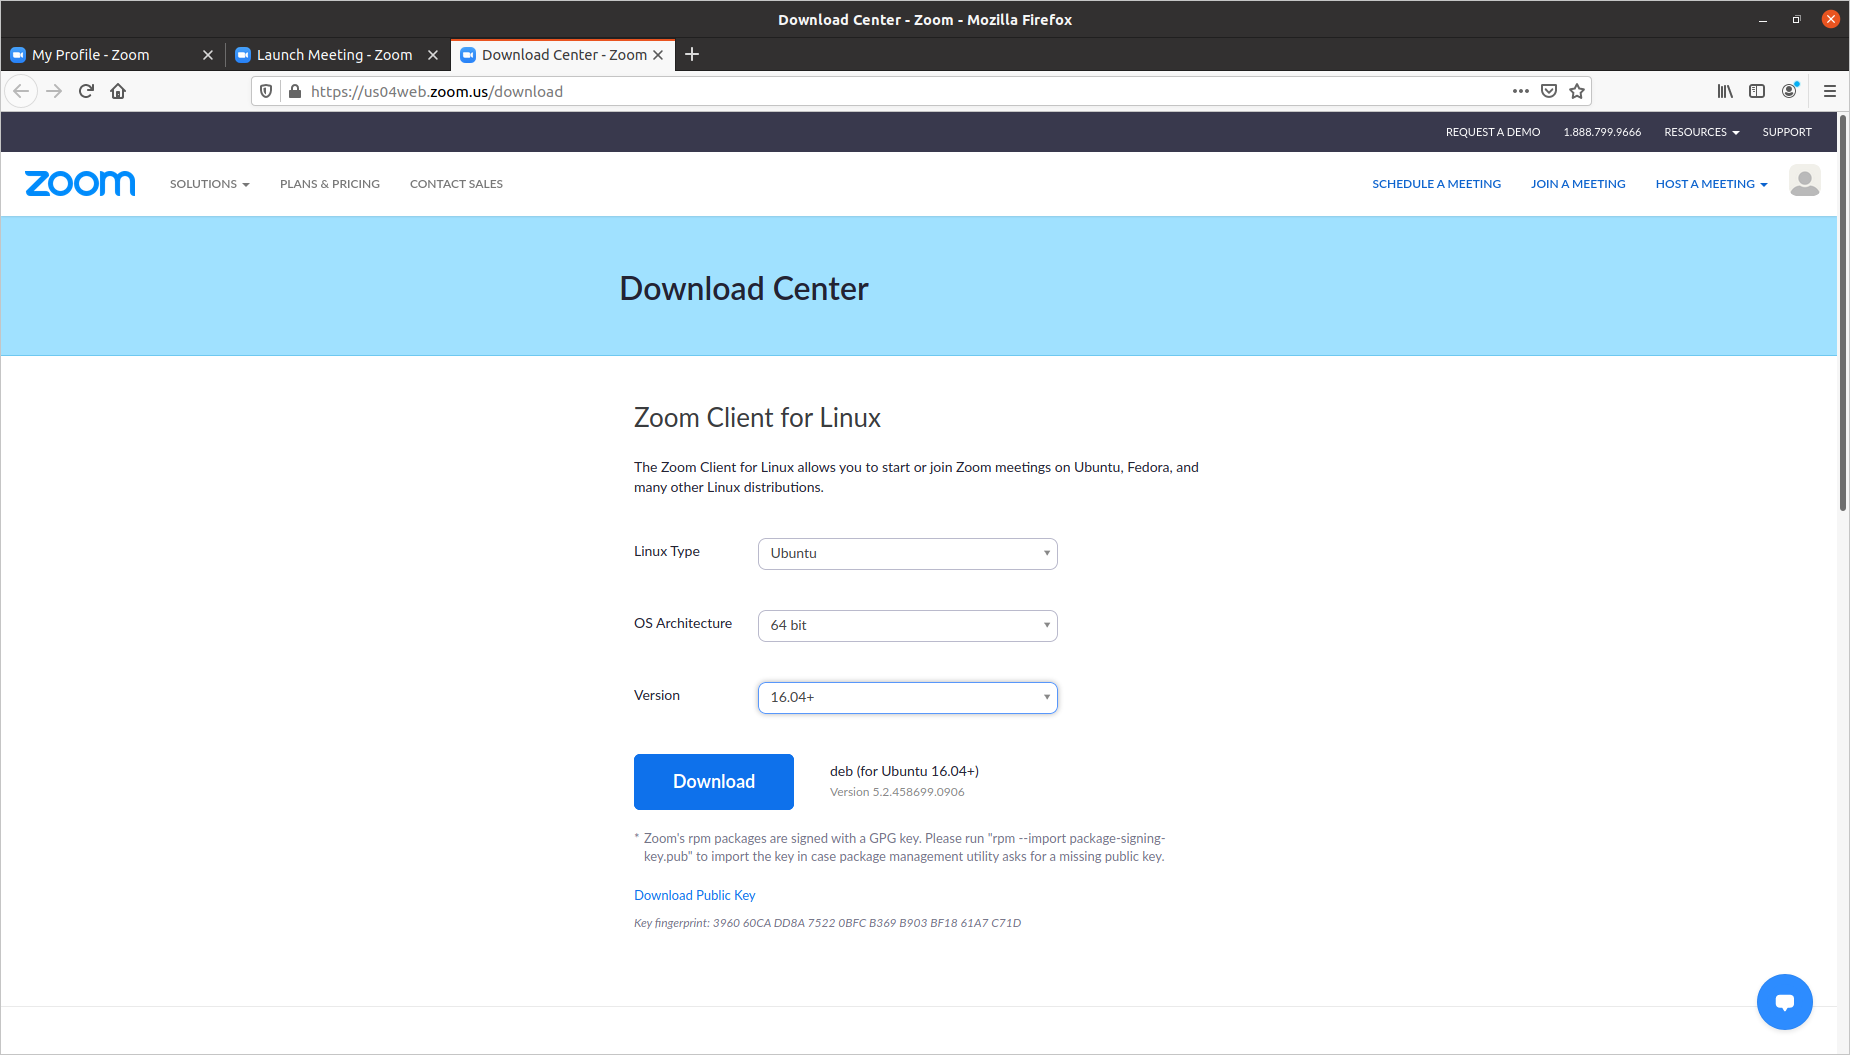
1. Go to this webpage, and choose your operating system. Then click the button "Download", and when you are asked what to do with the file, choose the option "Save File", the intallation file will be saved in the "Downloads" folder.
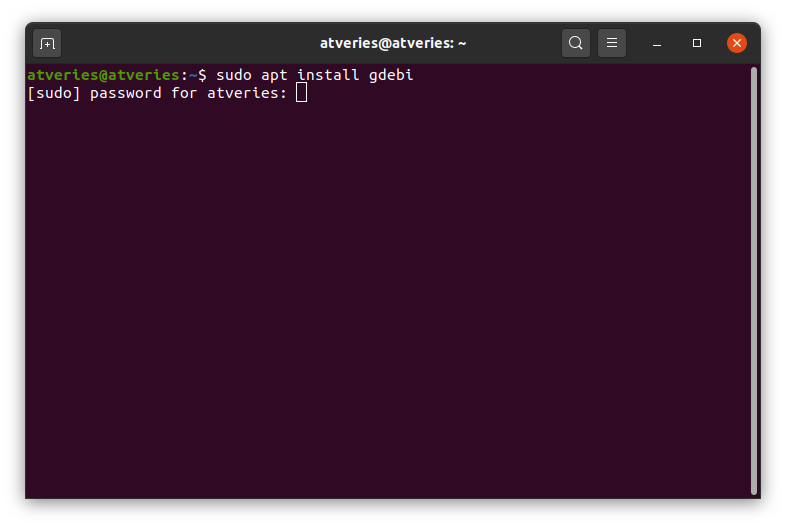
2. When you have chosen your operating system and downloaded the installation file, open the terminal and install the "gdebi" app, which is intended for unpackaging and installing "Debian" packages. Gdebi is much more effective at this task than the default "Software Center" app. To install Gdebi enter the command "sudo apt install" in the terminal. You will be asked to provide thw password to your profile, enter it, and the app will start the installation process.
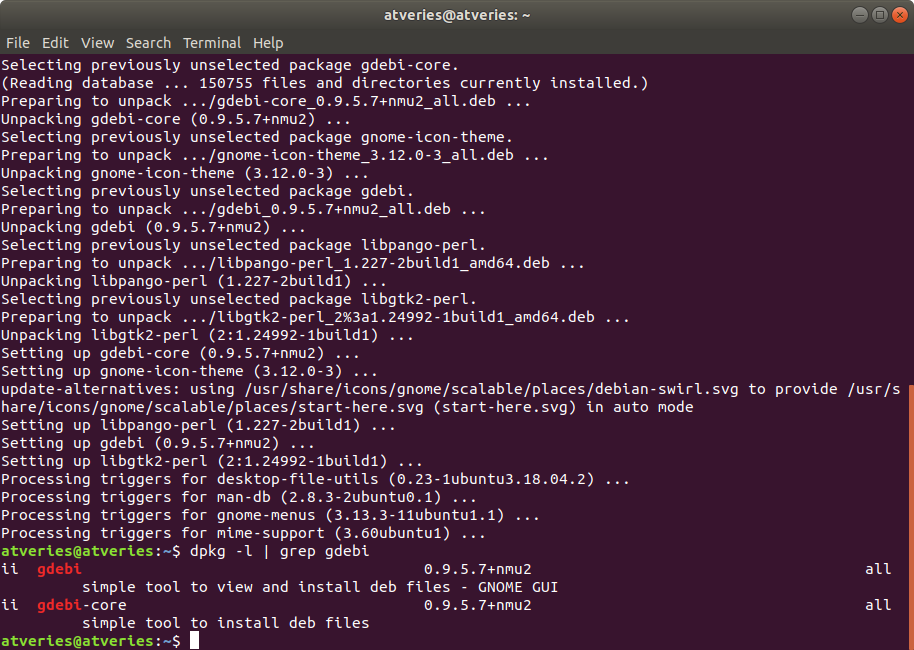
3. When the installation is complete, you can check if the app has installed correctly by entering the command dpkg -l | grep gdebi. If you have the same output as in the picture below, then the app has been installed.
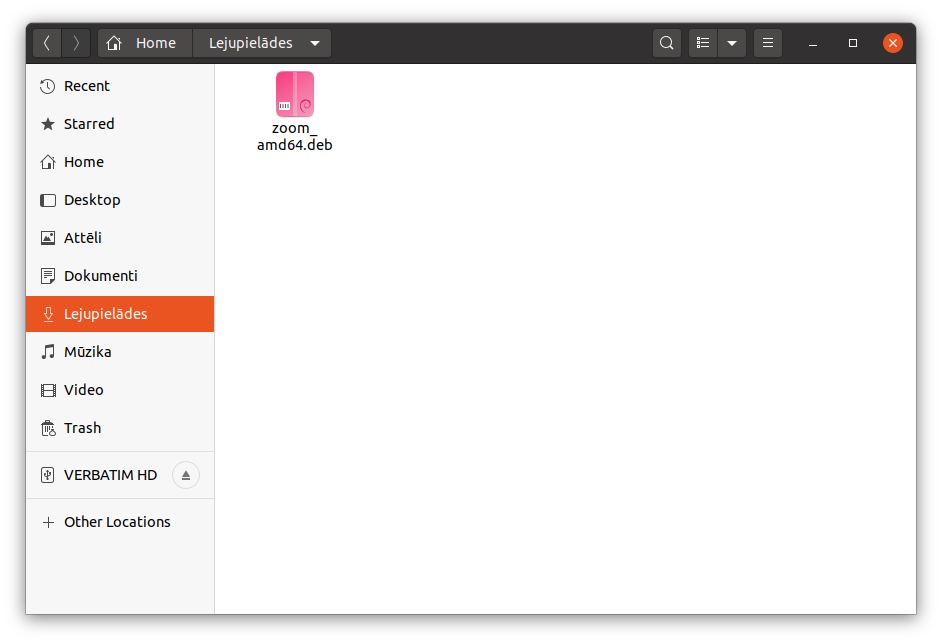
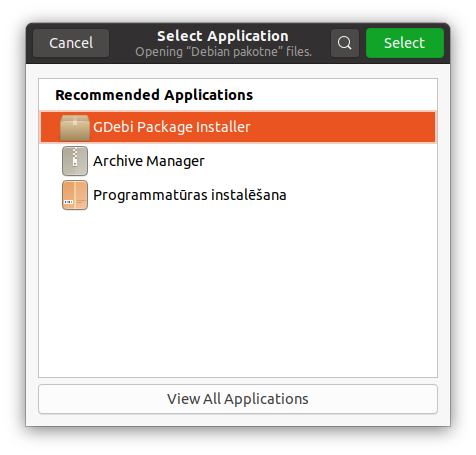
4. Then go to the "Downloads" folder, there you will find the "Zoom" installation file. Click on the file with the right mouse button and select "Open with other application". When a new window is opened choose the "Gdebi package installer" option, and click on the button "Select".
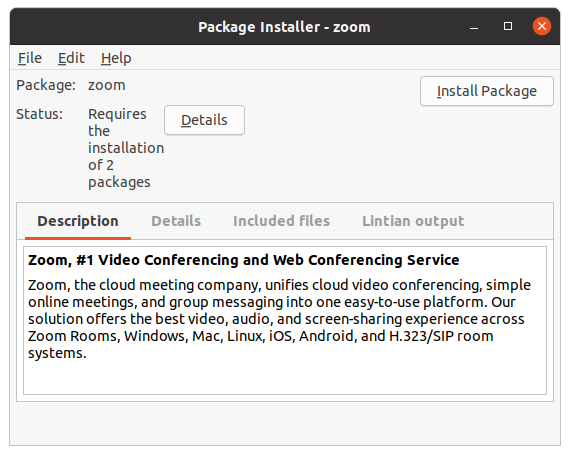
5. When the installation window is opened click on the "Install package" button, wait until it has finished installing and then this step is done!
3. How to schedule a meeting
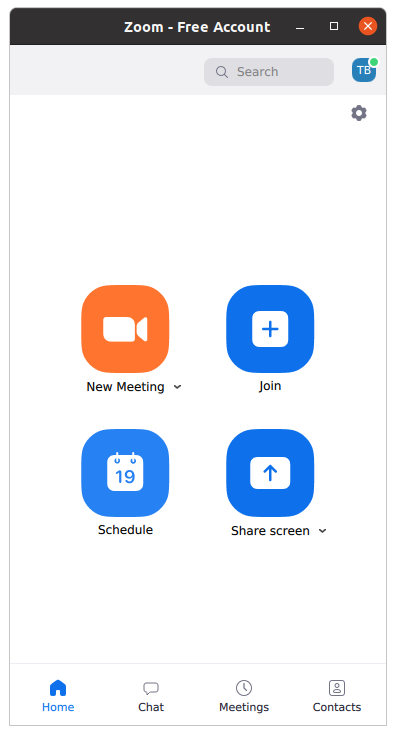
1. When you have turned on, and logged into Zoom, you will be greeted by this window. To schedule a meeting click on the button "Schedule".
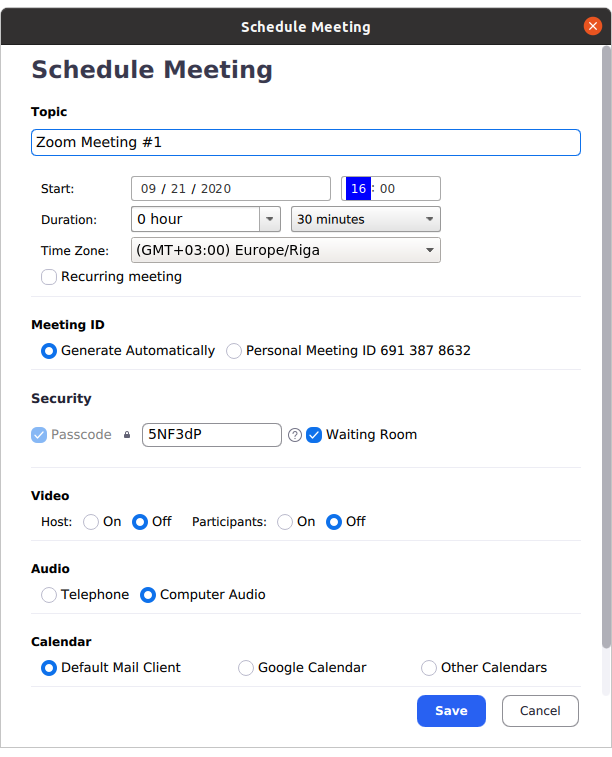
2. When you press the button "Schedule" you will see this window. Here you can fill in the information as needed.
“Topic” is the theme of the meeting, for example "Seventh lesson in Maths - Trigonometry basics".
It is also possible to make camera usage mandatory for all participants, for example, if a school or university has mandatory attendance,
cameras can help determine if someone is present in the lecture or not.
When you have finished setting the meeting up, press the button "Save".
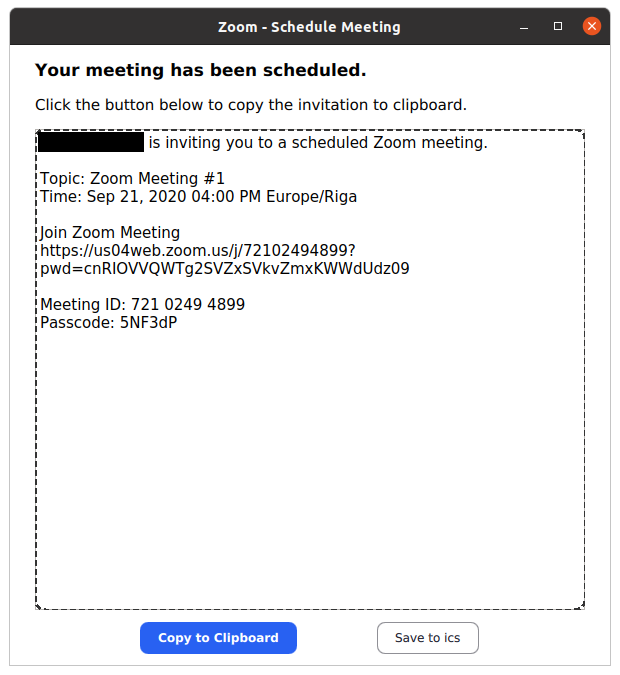
3. When you have scheduled and saved the meeting, you can send out the invites to the meeting. You can do it by clicking on the button "Copy to clipboard" and then sending it to the participants via e-mail, or other options.
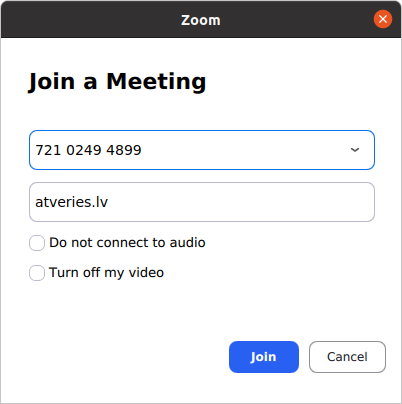
4. How to join a meeting
There are two options how to join a "Zoom" meeting:
- Option 1, join through a link: Open e-mail or wherever the host has sent the invite to the meeting. Click on the link which has the text "Join Zoom Meeting" above it.
- Option 2, join through the downloaded app "Zoom":
1. Open "Zoom"
2. Click on "Join" and put in the meeting ID and your name.
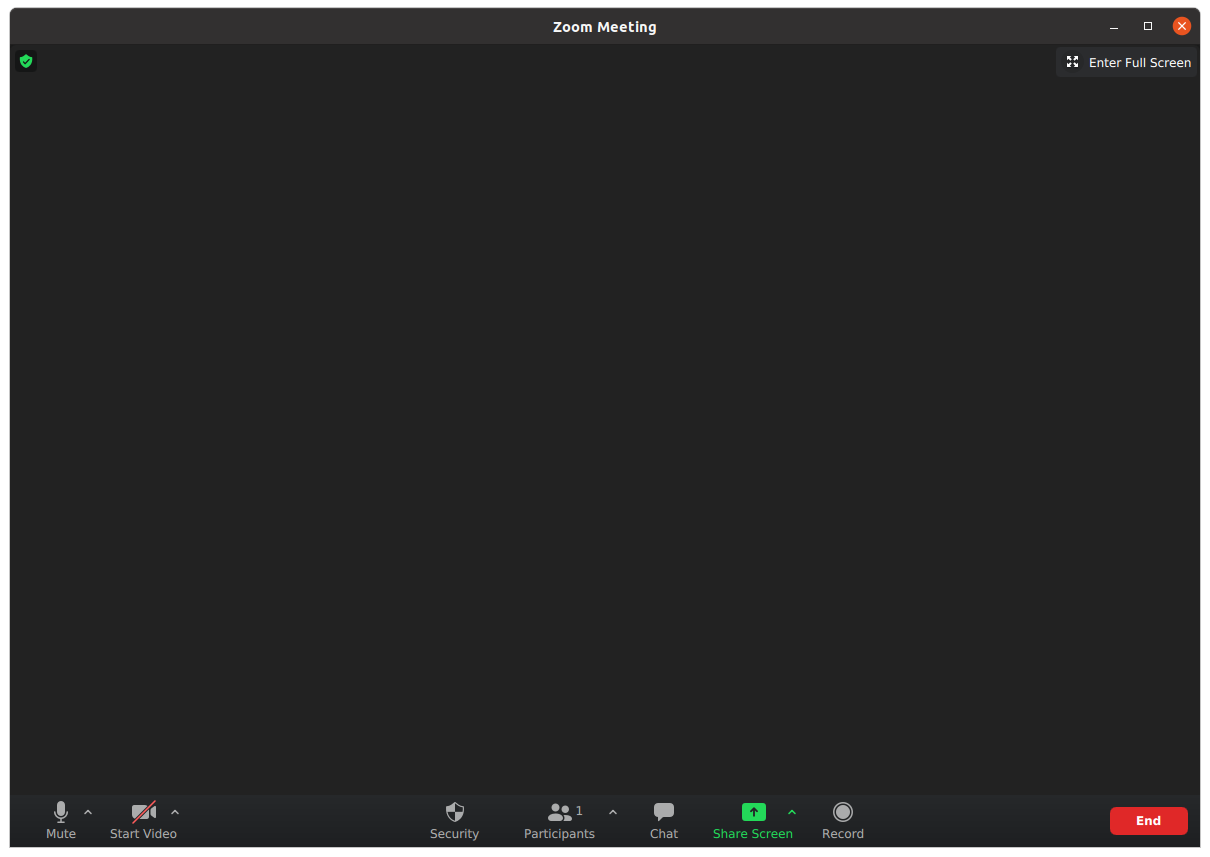
5. How to create a meeting
1. Open the Zoom app and click on the button "New Meeting".
2. When you will have done that, your meeting will start immediately.
3. To invite other participants click on "Participants", a new section will open where all participants are listed.
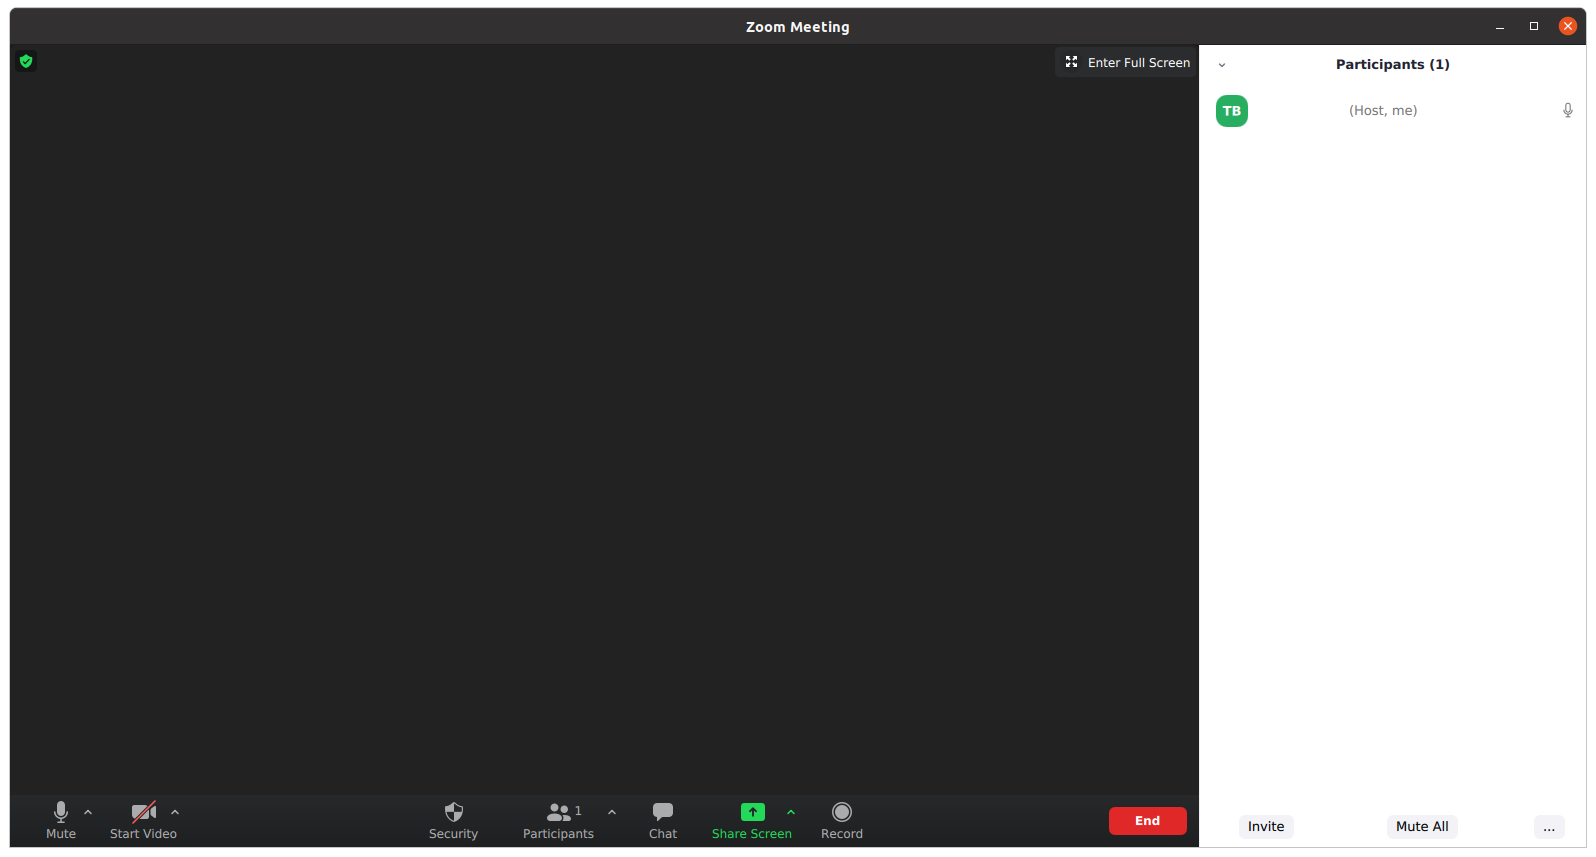
4. In the section "Participants" in the lower left side is a button "Copy invitation", when you press it, the invitation to the meeting will be copied to your clipboard, and you can send it to other participants.
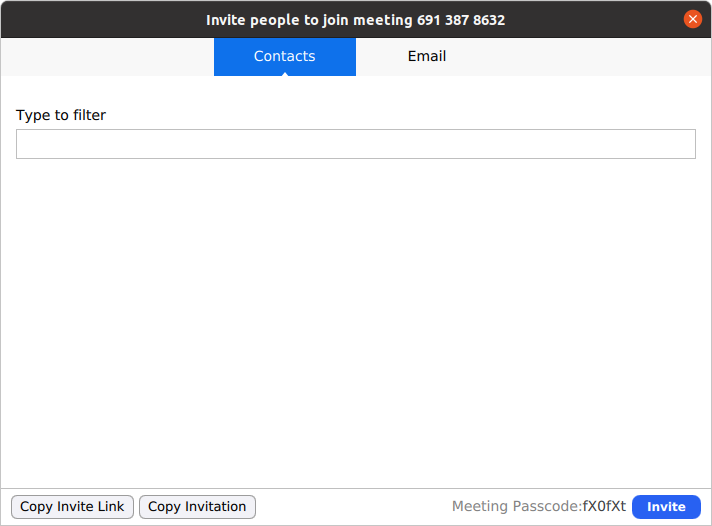
The invitation will look like this:
Join Zoom Meeting
https://us04web.zoom.us/j/72590879584?pwd=bTRyeUd1ZnZMY1BJbTdlY0t0YlN3Zz09
Meeting ID: 725 9087 9584
Passcode: V33BxH
6. How to record a meeting
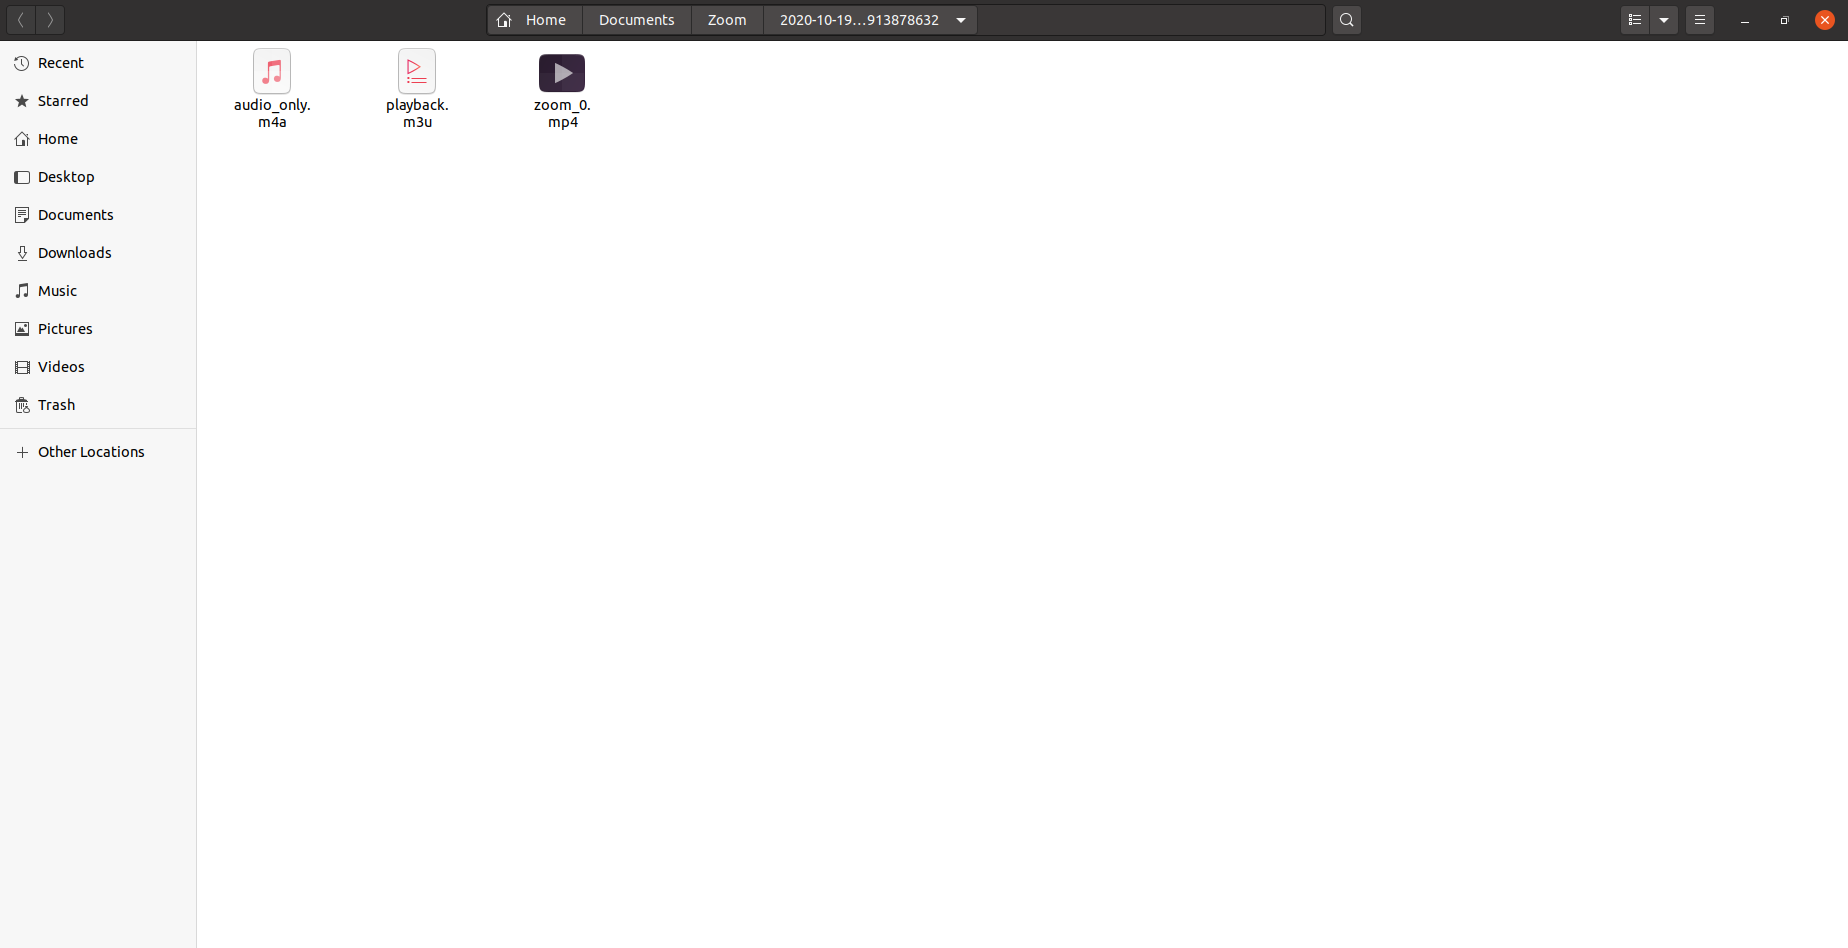
1. Click the button “Record” on the lower right side.
2. When the meeting will have ended, the recording will automatically be saved, and the folder where it is saved will be opened. Then you can send the recording to your students / other participants.
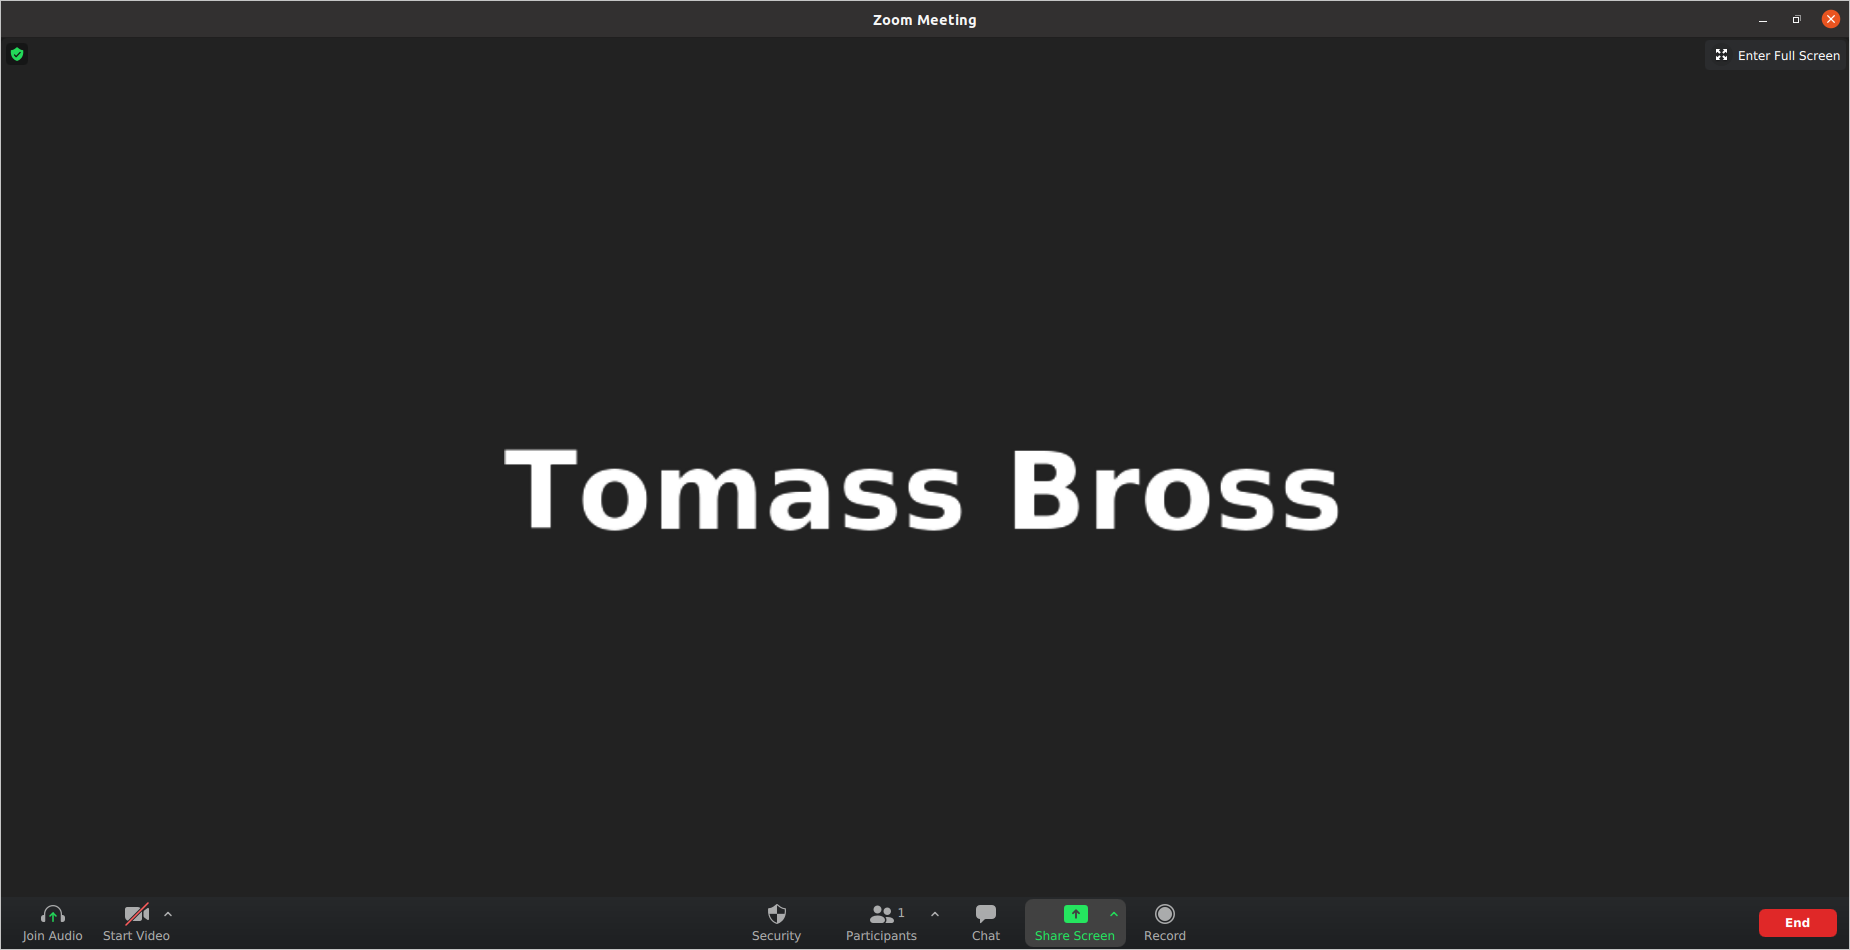
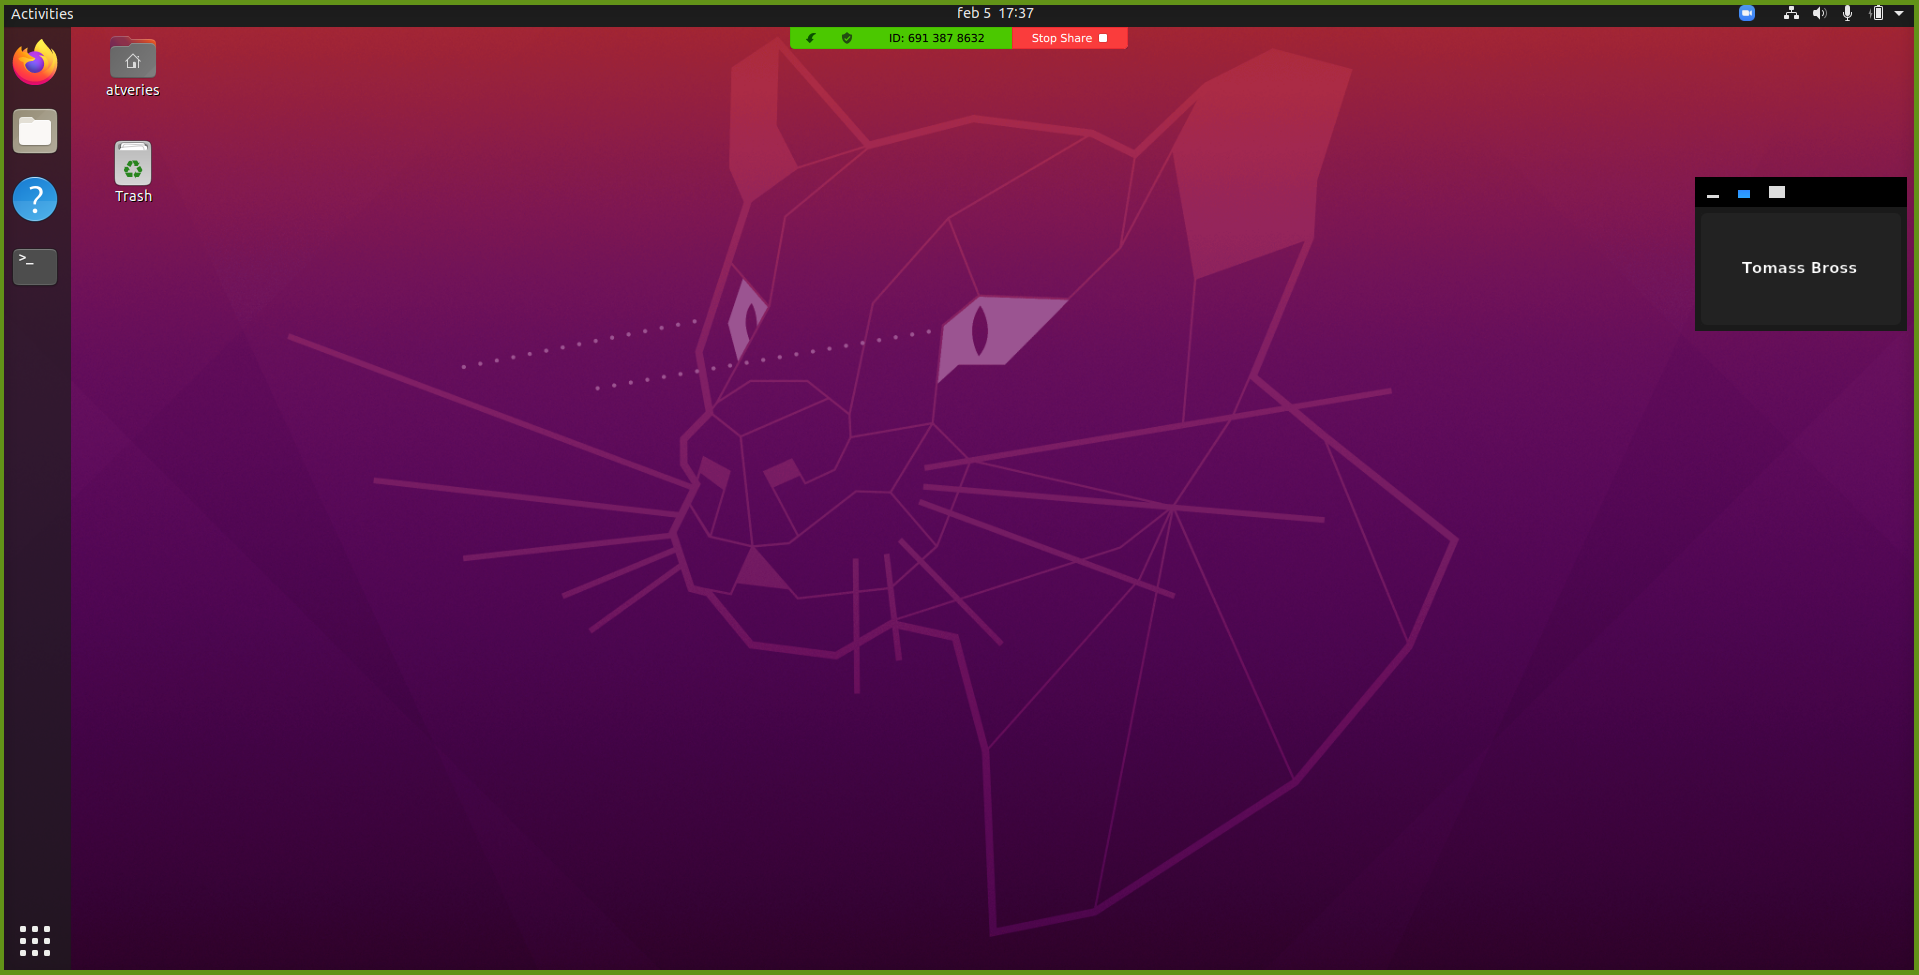
7. How to share your screen
1. In the lower navigation bar press the green "Share screen" button.
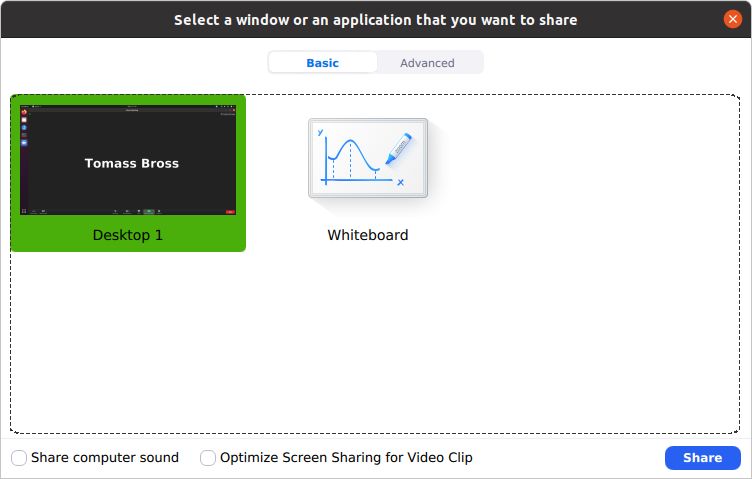
2. Then choose what you want to share. It is possible to also share a "whiteboard" where you can freely draw and write - just like a real whiteboard. When you have made your choice, click on your choice and click on the button "Share" in the lower right corner.
3. When you want to stop sharing, click on the button "Stop sharing".
Return to the top of the page.

